GraphiQL
This tutorial will guide you how to use GraphiQL for testing GraphQL api and reading document of GraphiQL api.
What is GraphiQL?
The GraphiQL is the GraphQL integrated development environment (IDE) which enables you to write and execute operations, define variables, view operation results, and explore your schema, among other things.
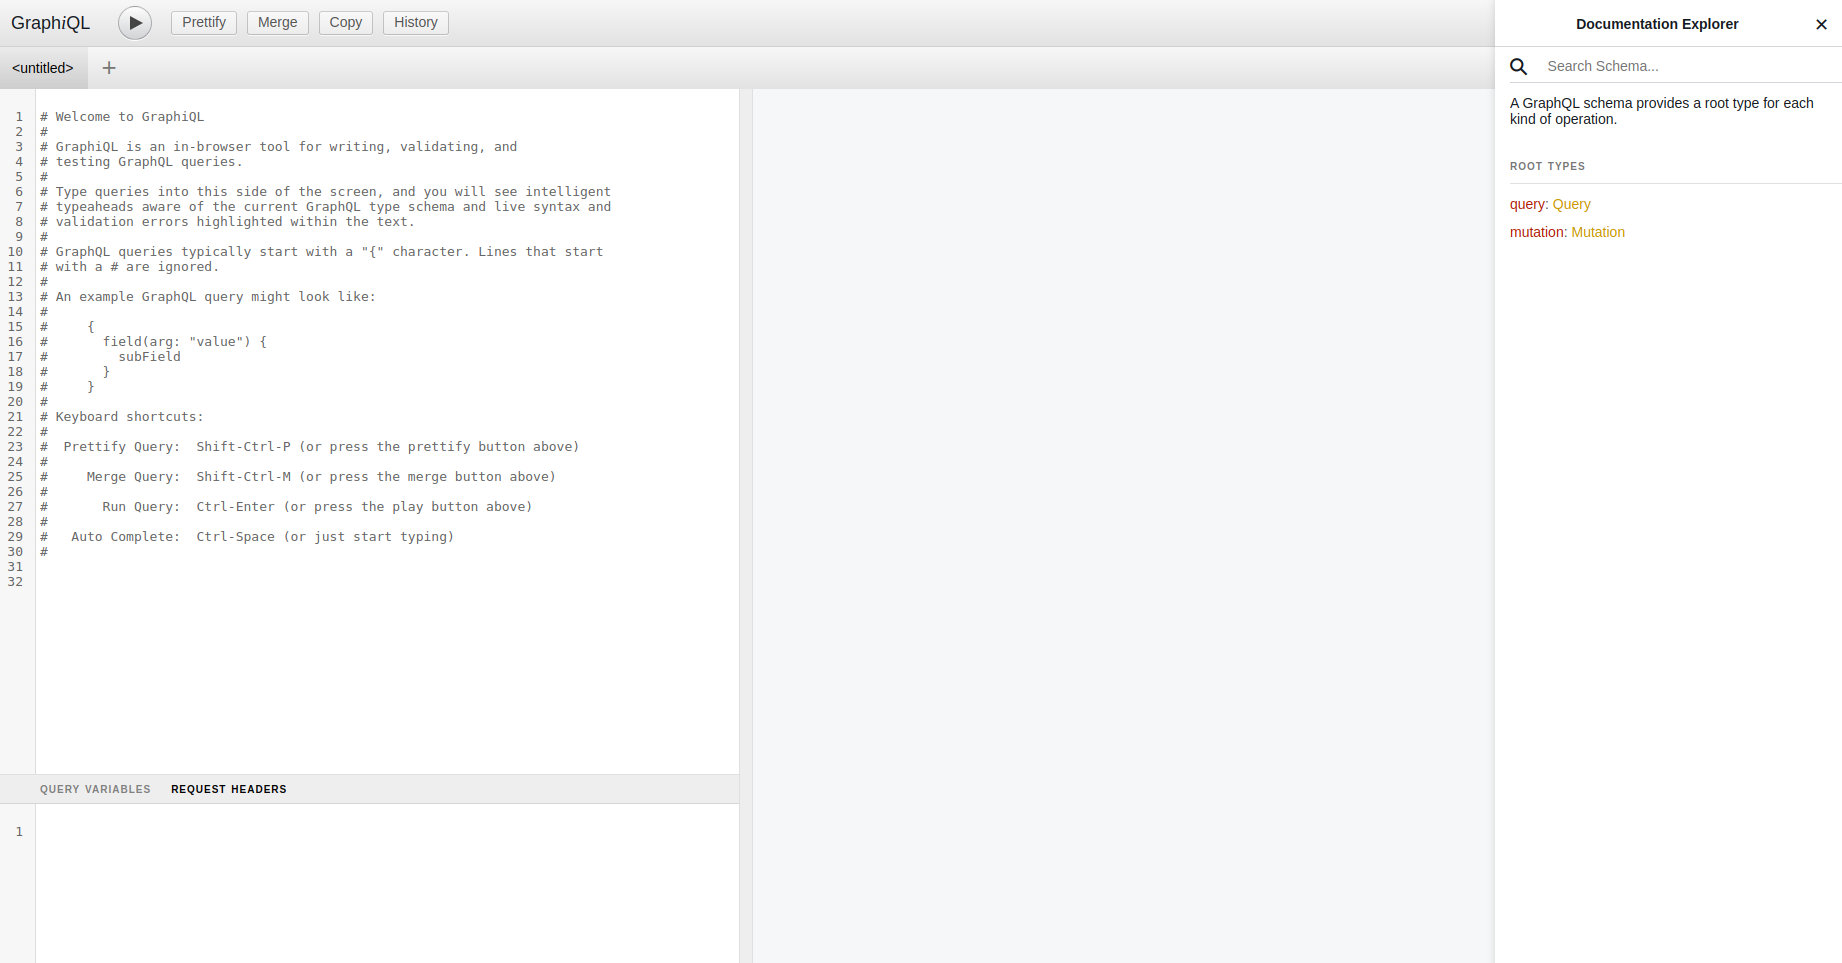
The following sections describe all of the elements you can interact with in the GraphiQL user interface.
-
Query Pane: The left-hand pane in GraphiQL is the query pane. This is where you write GraphQL queries and mutations.
-
Query Variables Pane: The lower-left pane in GraphiQL is the query variables pane. This is where you can define variables that you are using in your query or mutation. You should write variables in JSON format.
-
Results Pane: The right-hand pane in GraphiQL is the results pane. This is where GraphiQL displays the results of the most recently executed query or mutation, in JSON format.
-
Documentation Explorer Pane: The Docs button expands the Documentation Explorer pane on the right-hand side of the page. The Documentation Explorer pane enables you to search or browse through the GraphQL schema. This allows you to explore all of the possible queries, mutations, fields, types, arguments, and other schema elements that you can use.
-
Toolbar Buttons: The following buttons display in the toolbar at the top of the GraphiQL browser:
-
The Execute Query (Play) button executes the query or mutation in the main query pane.
-
The Prettify button re-formats the text in the main query pane to make it easier to read. If your query or mutation is not properly formed, the Prettify button turns red when you click it and does not format the text. If there is only one unnamed query in the query pane, then clicking Prettify also removes the query operation type from the query.
-
The Merge button is similar to the Prettify button, except it also flattens a query that contains defined fragments.
-
The Copy button copies all of the text in the main query pane to your clipboard, enabling you to paste your query or mutation elsewhere.
-
The History button opens a new pane on the left side of the page that contains a list of the previous queries you have run in the GraphiQL interface. You can click a query to add it to the main query pane.
-
Tutorials
Start all microservices with Tilt
Note: If you backend services is running, You can skip this process.
-
Go to
tiltflodercd tilt -
Run Docker login as apiplus-bot to pull backend services image from github private container registry.
echo 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 | docker login ghcr.io -u apiplus-bot --password-stdin -
Run setup script
make setup -
Start all microservices
make up -
Go to http://localhost:10350 to check that all services are ready
Test productCreate mutation in FoundationAdminAPI
-
Open browser then go to FoundationAdminAPI url at https://foundation-admin.naaraan.dev
-
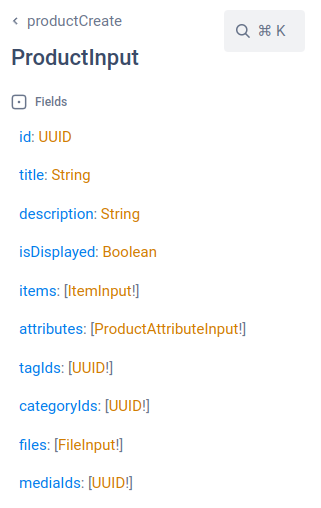
Search for
productCreatemutation input and return type in Documentation Explorer pane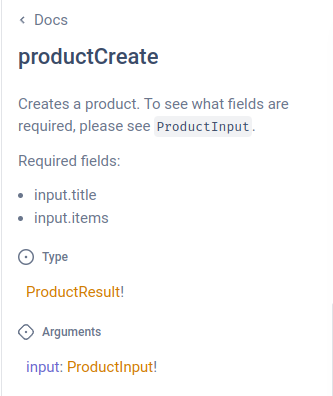
-
Create a
productCreatemutation string in Query Panemutation productCreate($input: ProductInput!) {
productCreate(input: $input) {
product {
id
title
isDisplayed
items {
inventories {
qtyAvailable
}
}
}
userErrors {
message
field
errorCode
}
}
} -
After you have created BusinessUnit and registered admin account, You can set
Headerspane withBusiness-UnitandAuthorizationfrom Postman tutorial.{
"Business-Unit": "<your_business_unit_id>",
"Authorization": "Barer <your_access_token>"
} -
Enter product this basic product input in
Variablespane{
"input": {
"title": "demo product",
"items": [
{
"title": "demo product",
"itemClass": "SALES",
"inventories": [
{
"qtyAvailable": 10
}
],
"prices": [
{
"priceAmount": "100"
}
]
}
]
}
} -
Execute
productCreatemutation. You will see the result.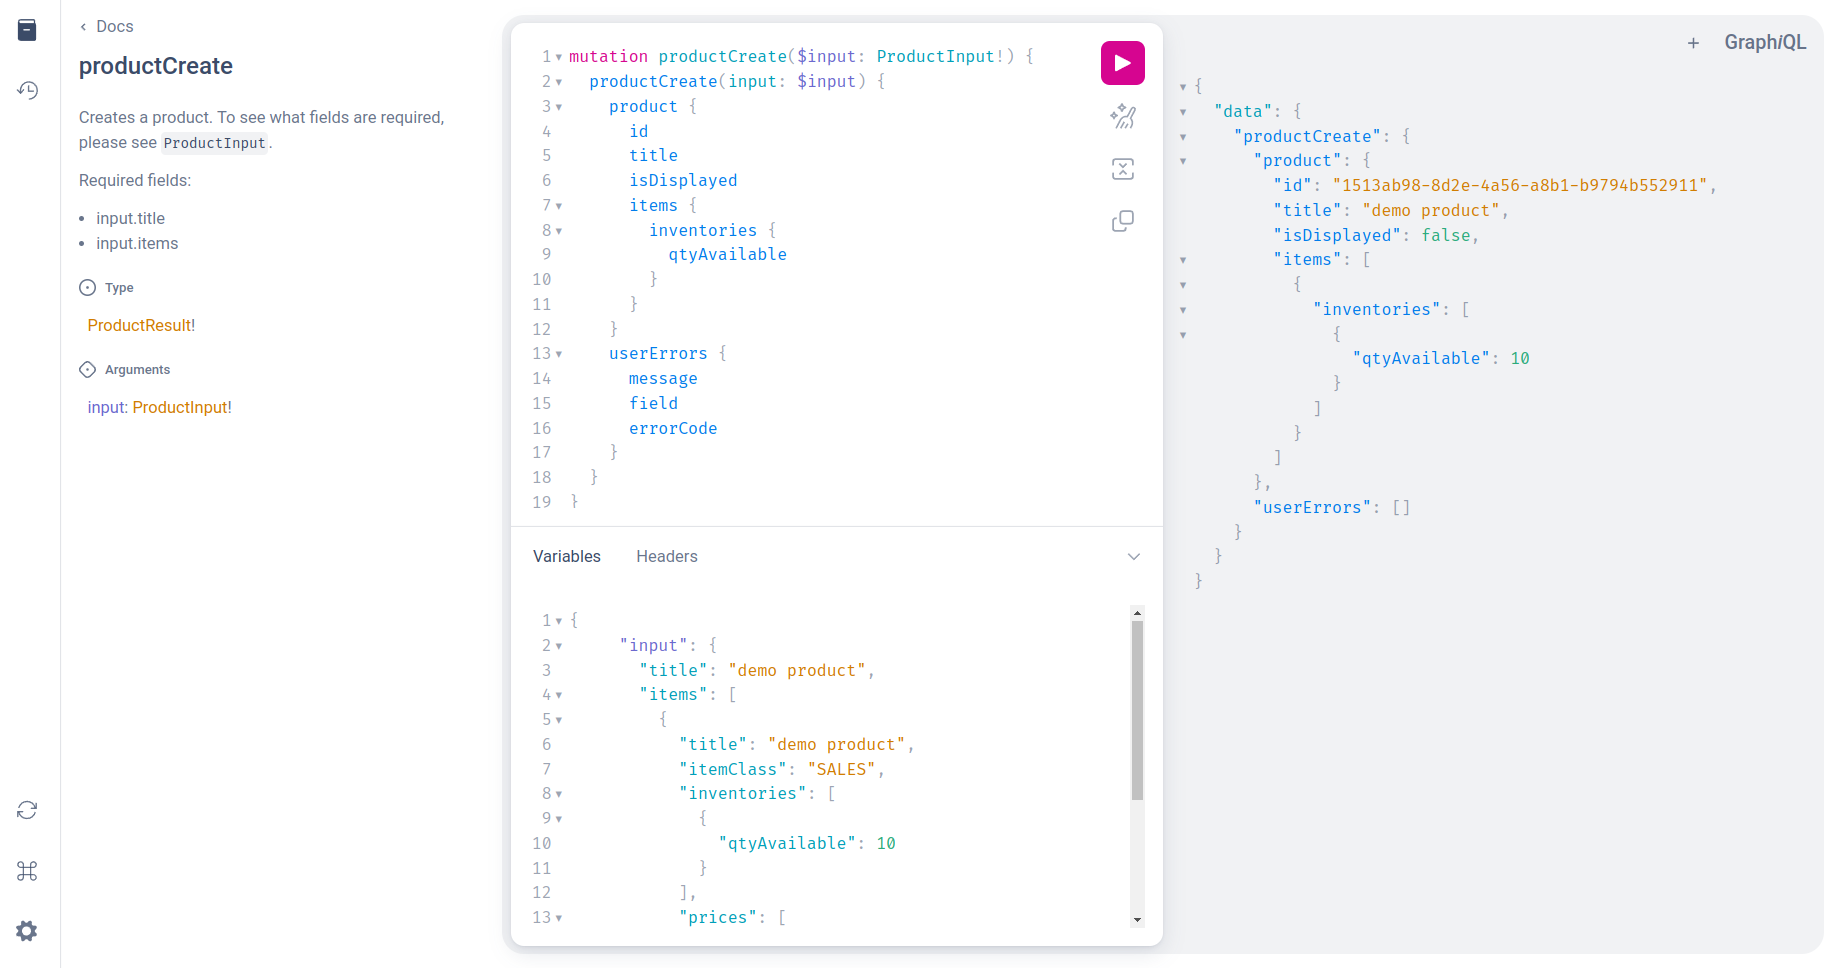
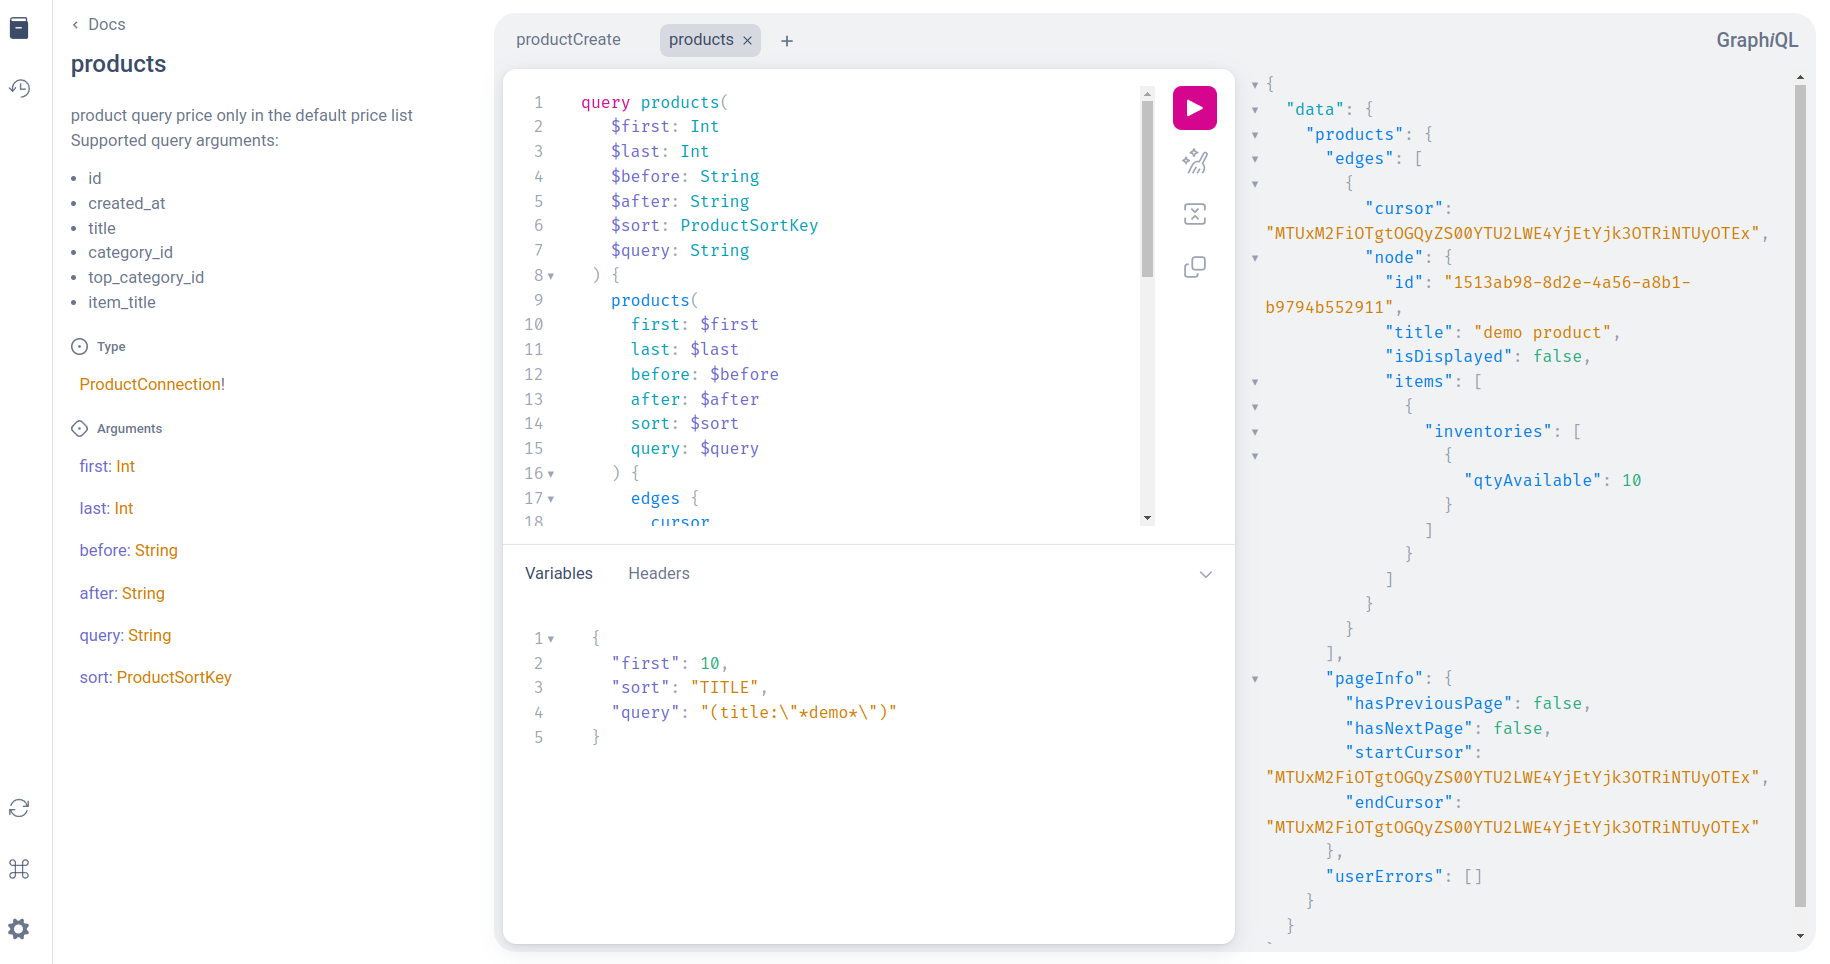
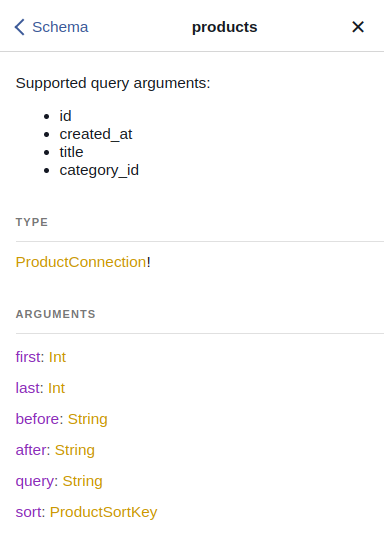
Test products query in FoundationAdminAPI
-
Add new tab and Search for products query input and return type in Documentation Explorer pane
-
Create a
productsquery string in Query Panequery products(
$first: Int
$last: Int
$before: String
$after: String
$sort: ProductSortKey
$query: String
) {
products(
first: $first
last: $last
before: $before
after: $after
sort: $sort
query: $query
) {
edges {
cursor
node {
id
title
isDisplayed
items {
inventories {
qtyAvailable
}
}
}
}
pageInfo {
hasPreviousPage
hasNextPage
startCursor
endCursor
}
userErrors {
message
field
}
}
} -
After you have created BusinessUnit and registered admin account, You can set
Headerspane withBusiness-UnitandAuthorizationfrom Postman tutorial.{
"Business-Unit": "<your_business_unit_id>",
"Authorization": "Barer <your_access_token>"
} -
Execute
productsquery. You will see the result.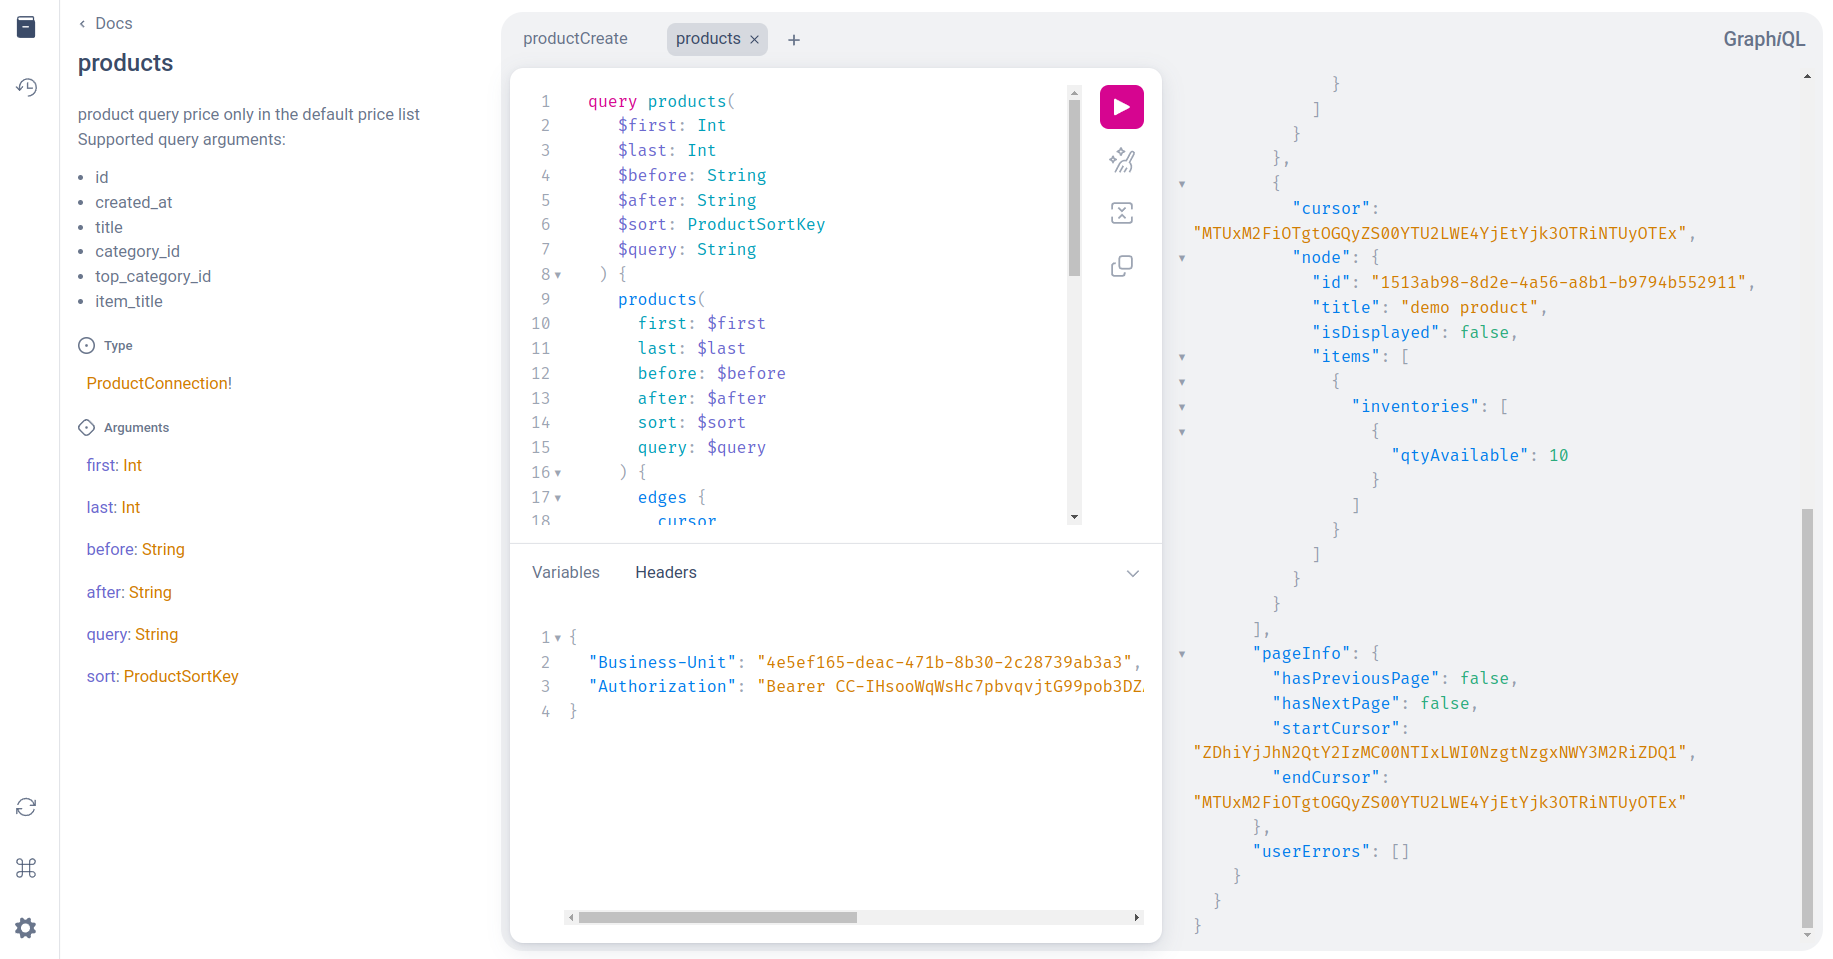
Test products query with input
-
You can set GraphQL input in
QUERY VARIABLESpane in json format.Ex. If you want to query first 10 products that sorted by product title and filter only product title contains with "basic" you can send these input json:
{
  "first": 10,
  "sort": "TITLE",
  "query": "(title:\"*demo*\")"
}
Note that you can find more information about search query syntax here.
-
Execute
productsquery. You will see the result.